Wednesday, July 16, 2014

Ideas, Please.

The last few months of school, as I walked by our maintenance dept., I kept seeing a library card catalog sitting in the middle of the concrete floor.  Day after day I would peek through the 5" x 24" window to make sure it was still there.
 
Finally, I decided to ask our custodian if I could have it.  He said he was on using it for his drink holder, and he was thinking about using it to store nuts and bolts in.  NUTS AND BOLTS! Luckily, he is a wonderful man who saw my vision and offered to deliver it to my house the next day.  You can't beat free furniture and free delivery.

 
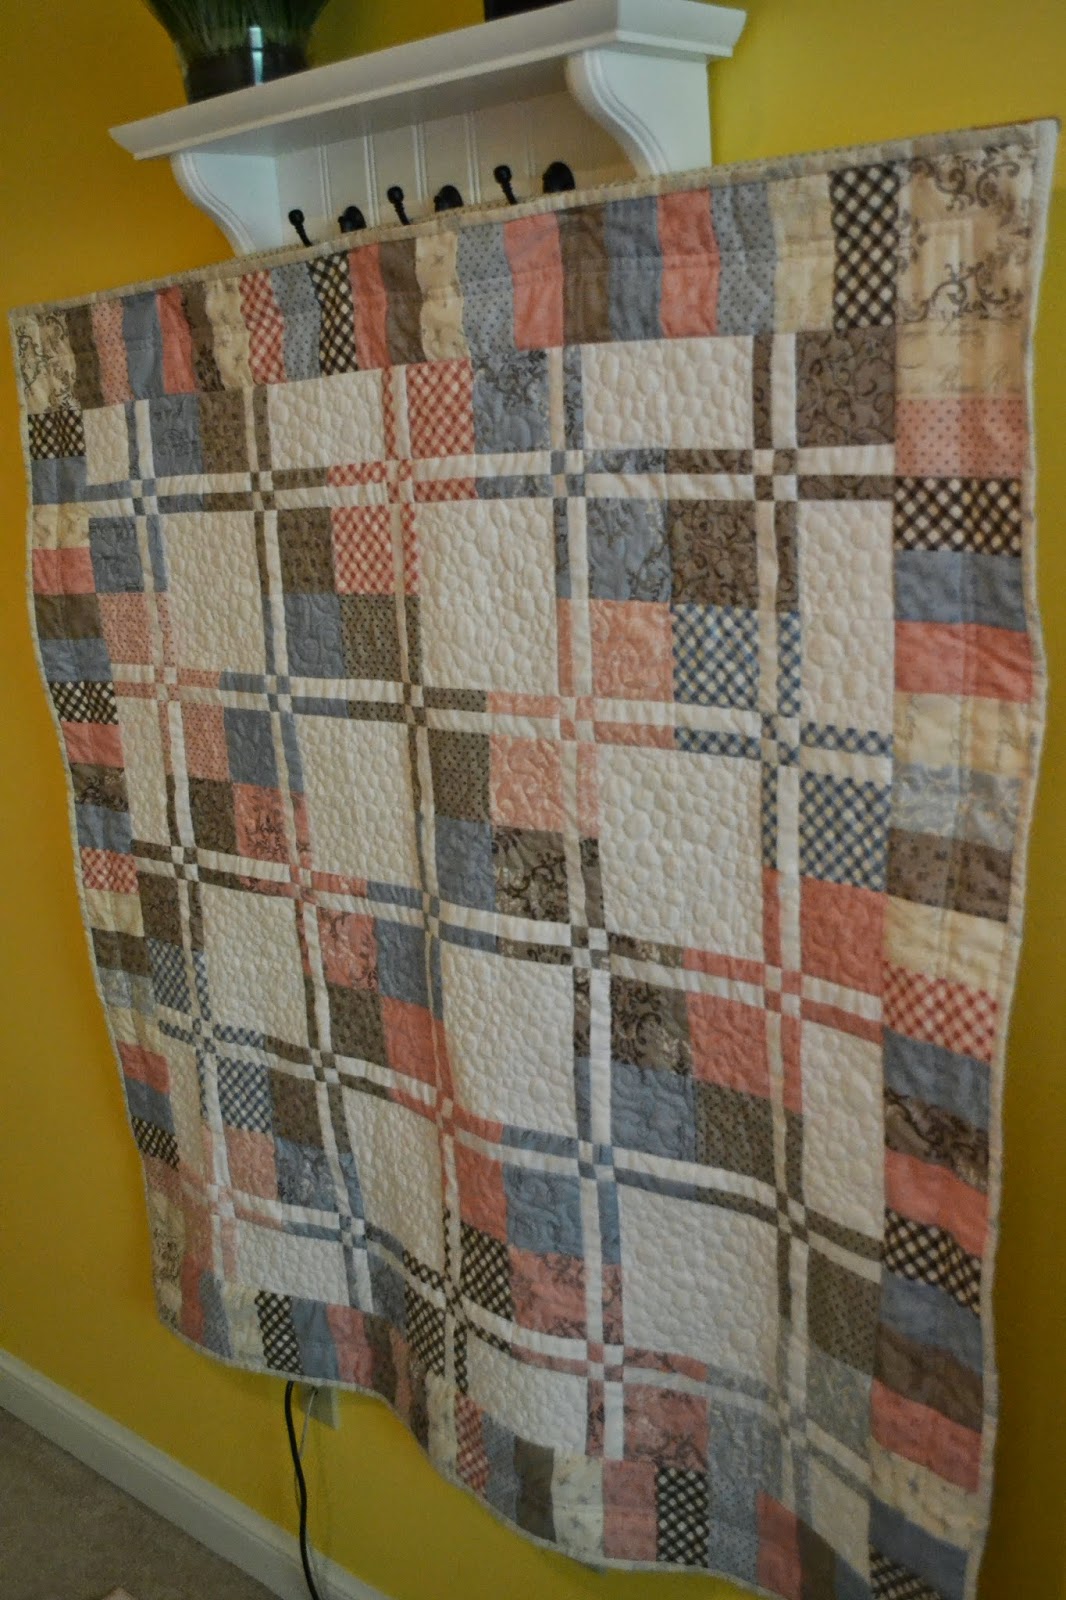
So now I have this marvelous storage unit.  It is 4 modular units stacked together, so I can arrange them however I choose.  There are even two pull out trays.  All I need to do is turn it into my dream sewing cupboard.  The 25 drawers are the perfect size for scissors, threads, and anything else I can think of. 
 
This is what I'm thinking, but I would love your ideas.  For now it sadly sits in the corner waiting for some love.
 
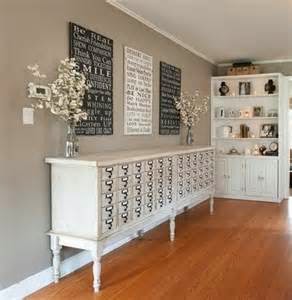
Picture from Pinterest

Tuesday, July 15, 2014

Camper's First Overnighter

In the yesterday's post I showed you some of the projects we completed at the cabin in preparation for Girl's Pre-camp.  Today I will show you a few pictures of A Frayed Knot on her first over-nighter.  My daughter Jenn and her husband stayed in the camper during pre-camp while the other adults and the girls stayed in the cabin or in tents.
 Here is the camper all set up.
 Outdoor rug is from IKEA..
 The couch was turned into a bed with soft white sheets and an antique quilt.  The suitcases that normally serve as night stands tuck under the bed.
The camper was parked in the field near the cabin.  After setting everything up we took our grandson to the airport and did a fly over.
You can just make out the cabin just off the wing.  It was a lot of work to get everything ready but I love a dead line.  You always seem to get so much more done when you are under pressure.  And we were so glad to be able to share our getaways with the sweet young women in our daughter's ward.
Diana

Monday, July 14, 2014

Cabin Update

What a week!  Between getting the camper ready for her first overnight and doing some last minute projects out at the cabin, we are all exhausted!  Both were used this last weekend for pre-camp.  I will walk you through some of the improvements.
 We did a lot of paneling including the kitchen ceiling.  We also changed the layout of some of the furniture.  The table was moved into the kitchen to make room for the new sleeper sofa which I forgot to get a picture of.
 It is so nice to not see insulation and framing anymore.
 The bathroom got green board put up in preparation for tile, mud and paint.  We went ahead and hung some curtains for privacy.
The sink drain pipes were connected to the septic line.  That meant the sink could go in.  Of course all this will have to come back out to mud and paint but until then we are enjoying having a sink.  Next on the honey do list is hooking up the shower drain, finishing the bathroom and then putting up more paneling in the entry area.  Once that is done we will put down the bamboo floors and do all the trim.  We can actually see an end to this.  Whew!
Diana

Saturday, July 5, 2014

1963 Yellowstone Camper

After a long day of work yesterday (and weeks of hard work in the last few months!) the inside of the trailer is done!  Yippee!  Here is what now greets me at the door.....
Just in case you have forgotten what we started with, the next few pictures should remind you.
 Ugly kitchen.
 Old cushions and rickety table.
 Dark and dingy just about summed it up.
 But now she is so pretty!  Fresh white paint, refinished appliances, quilted back splash and all the previous projects have really made her shine.
 The stove and ice box took a lot of sanding and prep but it was so worth it.  My husband is an expert at getting a perfect finish with automotive paint.  And he was able to cut a hole in the stainless steel back splash for the outlet cuz he has so many skills.  Mechanic, machinist, restorer, you name it, he can do it!
 The couch/bed area looks so comfy now.

 Here is the dining room.  Hubby hung the new hardware for the table and it works so much better than the old banged up one.  With vintage table cloths and a few accessories, this area just makes me smile!
 The table sleeps one as does the crows nest.  All in all we can sleep 4 adults or who knows how many little ones.
 We kept the old sink, formica counter and table top and the original floors.  They were just in too good of shape to do anything with them!
 A Frayed Knot certainly describes our mindset when we first started out on this project!
One last picture of the dining room.  I know we will continue to finesse the decor in here, plus we still need to start on the huge project of the exterior, but for now she is just perfect the way she is.  Plus we have a ton of projects to do at the cabin this next week (really all summer).  Hope you have enjoyed seeing what we have done with our little A Frayed Knot!
Diana

Wednesday, July 2, 2014

Disappearing Four Patch Quilt

I finally finished the disappearing four patch I had been working on forever.  I used Ooh La La fabric from Moda.  I love how soft and muted the colors are.
I really stretched myself with this one.
  It measures 49 by 49 inches.

 The backing is from the same fabric line.
 I machined quilted the quilt using an abstract swirl for the printed fabric areas.....
 and tiny little pebbles for the white areas.
As much as I love this quilt it is going in our Etsy Shop!  I have had so many quilts sell lately I needed to restock......unlucky for me but lucky for one of you!
Diana