Friday, July 31, 2015

Sew Your Own Pastry Cloth

I have a love/hate relationship with pinterest.  Just when I have about caught up with my latest project someone posts a pin that has me gathering supplies from online stores for a new project that I may or may not get to.  Hence the pile of fabric, paint, and misc. supplies piled around my sewing room.
 But once in a while I have gotten so excited about a pin I actually start right in on it as soon as that wonderful brown truck leaves my driveway.  Like this pastry cloth from Cami from Tidbits  I saw a few weeks ago.  
HAD TO MAKE THEM!  Well actually had to make 5 of them.  I used to have one as a new bride but when it finally fell apart I never replaced it.  But my old one didn't have those cute red stripes down both sides that look like a vintage tea towel.  And it wasn't two layers thick either.  Cami walks you through the construction of the pastry cloth with pictures.  Yipee!  
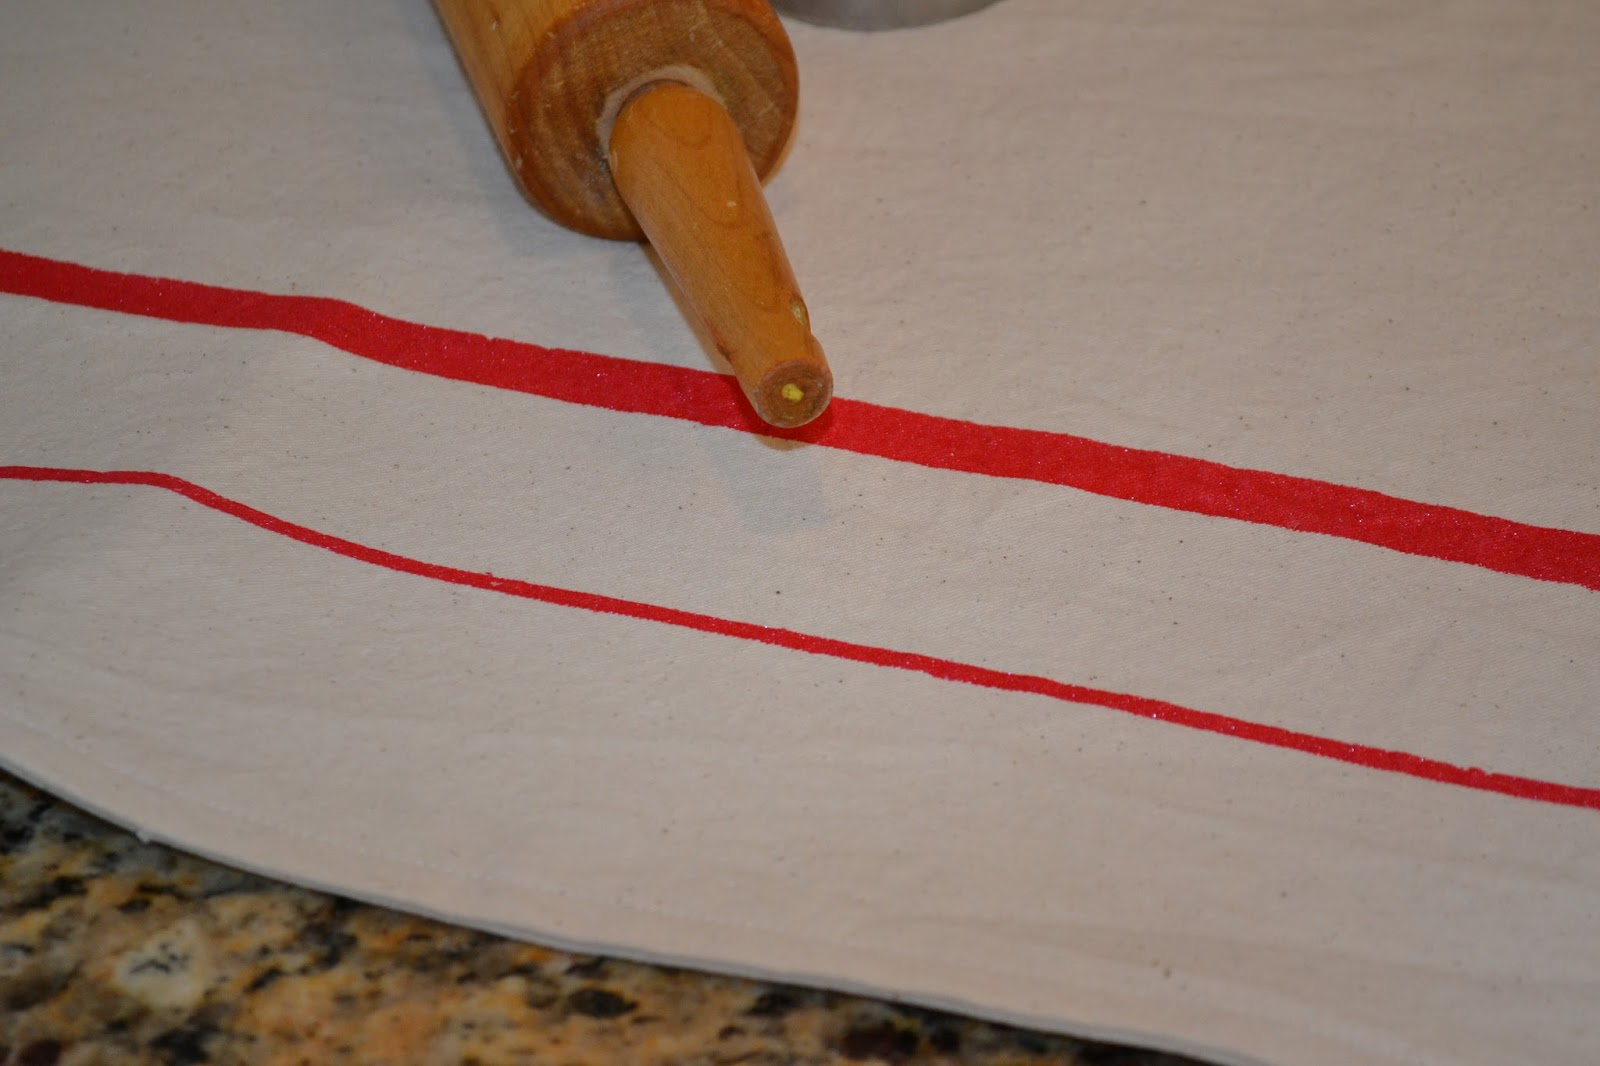
You can't see it in this picture but the fabric paint I used has glitter in it!!!!!  That can't hurt you if it gets in the pie crust, right?  Maybe I better flip it over and use the unpainted side.  Though I have scrubbed at that red stripe and not one bit of glitter has come off.  Plus, one can never have enough glitter in one's life, even when one is elbow deep in bread dough.  Note the use of the royal "one".
 Check out these vintage cutters.  Love the wood handles.
 Unlike Cami from TidbitsI only used one row of top stitching.  Guess I'm lazy that way.
I made my clothes to a finished size of about 23x28 inches.  Just the right size for my counter tops. 
I also made some cute tags to give away with the cloths.  
Hope you feel inspired to make one (or 5) yourself.
Diana

Thursday, July 30, 2015

Chocolate Tempering Machine!!!!!

OH MY GOODNESS, I got a chocolate tempering machine! A ChocoVision c116minirev1
Why, you might ask......because I am obsessed with getting the perfect shine on my chocolate treats and that snap that only tempered chocolate will make when broken!
And because I couldn't get the chocolate to behave itself with the "by hand" method.  And because my husband got a new boat.....  It can do dark, milk and white chocolate.  It has flashing lights and beeps.  It is perfect.  I love it.  And it is small enough to fit in an upper cabinet which meant I had to rearrange my kitchen cabinets to fit it in.  Then I had to repaint my kitchen so the dishes that got moved to the plate rack would match.  So worth it. 
Sooooo, now I have this miracle of a chocolate tempering machine that works beautifully every time.
And I have perfectly shiny chocolate.
Diana


Wednesday, July 29, 2015

Mini Cake Pop Ice Cream Cones

Happy 4th Y'all!  Oh wait, the 4th was three weeks ago......so I'm a little behind with my posts.  No problem, you can make these cute treats anytime!  They are only about 3 inches tall, barely a mouthful.....well, maybe 2 mouthfuls.
 My sister-in-law/good friend Milly and I made these for a 4th of July block party in Idaho.  So fun.
 We got the mini cones at Michaels,  We made the cake ball small enough to look like tiny scoops of ice cream.  Keep in mind they will have a few coats of candy melts which will enlarge them.
We decorated the tops with stars and large red Sixlets!  Don't they look like juicy cherries?
Hint: dip rim of cone in melted candy melts and immediately place an uncoated cake ball on top of the cone.  Let harden.  Now you can hold on to the cone to dip the cake ball into more melts!  Any drips look like ice cream melting down the cone!
Diana