Showing posts with label makeovers. Show all posts

Friday, March 24, 2017

NOT!

Looks like a simple project doesn't it?  Not so much.
 Well it actually was a simple project, I must have walked under an ladder or crossed paths with a black cat cuz it took me multiple tries to get this right.  And we won't even talk about the other project I really messed up........  And yes I do get the irony of the above wall hanging sentiment........
 First started with a vinyl stencil cut on my silhouette that I totally put on the wood crooked.   Didn't figure that out til after I stenciled all the words.  So repainted cream over the entire thing and decided to give myself a day to figure out how to do it better.  Today I redid the silhouette file and tried to cut new vinyl and it would not cut for the life of me.  Not the first cut or the 6th, 7th or 8th cut.  That's a lot of vinyl to waste.  Put in a call to the hot line,  Got some good advice.....none of it worked.   So I cut out cardstock stencils instead (silhouette would cut paper, just not the vinyl......go figure),  It was much messier to do it this way since the paper isn't adhesive like the vinyl but it worked!  After I finished the Today sign I did a little Farmhouse one.  

We are slowly redecorating our bedroom to match the master bath we remodeled last year.  New paint and some new items (like the bird cage light) brighten up the room.  We have new carpet on order too.  A few other rooms are getting facelifts so we are really staying busy around here.  Stay tuned for more updates.
Diana

Friday, March 18, 2016

Flea Market Flip

Do any of you watch HGTV's Flea Market Flip?  I love that show!  So many clever ideas.........
It was while watching one of the episodes that my husband and I saw one set of contestants turn an old window into a wall cabinet.
 I told my husband that I liked that idea and that I had an old window (hidden under a guest bed of all places) that would be perfect for the project.  Well, the next day he got to work and surprised me with the cabinet almost completed!
 He used pine tongue and groove to build the cabinet box and dividers that section off the interior.  A fresh coat of bright white makes the inside really pop.  (I did have to stop him from painting over the original paint on the window though!)  
Today he attached the hinges on the top and a magnetic closure and brought the finished cabinet in from his workshop in the barn.  It is securely hung on the wall so I can load it with some of my favorite items.  It hangs in the corner of our bedroom and looks so cool.  My husband is really talented and now that he is retired he finally has the time to get creative!  And I am getting so many of my wished for projects done!
Diana

Wednesday, November 13, 2013

Crazy Good Chair

I know I did a post on Picmonkey already but I thought you might be interested in another cool way you can use it!  Previewing what a project might look like BEFORE you ever pick up a paint brush or scissor!  Here is an example of a chair redo........
Here is the before chair and........
here is the chair after using this fabric with the drawing and overlay functions on Picmonkey.  How fun is that!  Just think, no more wondering what that redo will look like.  Oh and the fabric on the chair is one I came up with but isn't for sale (yet).  However, if you send me a note on Spoonflower I will update it on the shop so you can get it.
Diana
 

Tiny Tart Pan Ornaments

  I can't believe the countdown has begun for Christmas already!
 I want my tree to have more white on it this year so I made 36 of these lovely ornaments over the last day or two.  I used simple mini tart pans (available here).  I gave them a light spray of white paint.  Using a tiny drill bit I put a small hole at the top of each pan.  A simple o ring went in each hole for easy hanging.
 Then I punch out circles and scallops from old book pages.  These were glued on the inside of the pans.
 Next came out my jar of old buttons and bottle caps.  I gave the caps a spray of bronze paint and then combined buttons, caps and tiny gems into pleasing groups.  They were then glued here and there.  A bit of glitter pen on the edges of the paper.....then a quick blast of glitter spray. 
 Finally I hot glued small bows at the top of each ornament.  So pretty.
Don't worry about everything being perfect.  These are so much more interesting if the tin shows through.  Think vintage and shabby.......  Now they will look so nice on the tree, mixed in with all our other ornaments.  Yeah!
Diana

Wednesday, September 25, 2013

Hubs And Doilies

Just a few more pictures on our progress with the 1963 Yellowstone camper.  Below are the new half moon hubcaps.  Don't they look sweet? 
 Next is the pillow I put together using an old doily and some leftover fabric.  I thought the pink and aqua combo was perfect for the camper. 
My husband has been working hard on the lights so that she will be ready for her maiden voyage this Saturday.  We also got her registered so we are legal! 
Diana

Saturday, September 21, 2013

From Ugly To Fancy

How often have you seen one of these ugly vanity trays at garage sales and turned your nose up at it?  Me too!!!
Then I thought there must be something of value left in these old gals....
I found one that was really bad, the mirror was scratched and tarnished, the metal starting to rust at the corners, in other words, perfect!
 First I took it apart and replaced the back with a new piece of cardboard (covered in a pretty pink chevron fabric).  Then I painted the frame a bright pink.
 Since the mirror was so bad I thought I would etch an image on it.....a sweet bird!  What was once a piece destined for the dumpster is now ready for a second life.  I think this is now so pretty and cool!
Diana

Friday, September 20, 2013

Aqua Shelf For The Vintage Trailer

Someday I will have to remember to take before shots!  So here is the after instead.  Pretty, don't you think.
Oh well, I found a similar shelf (below), in finish and style, on the web so you could see what I started with.  Don't get me wrong, country has it's place but I am just not feeling it......Instead I love cottage style so the spray paint had to come out and play!  
Check back to see it in place in our camper.....
Diana

Mini Clipboards

Were yesterday's clipboards a little too large for your needs?  You can find much smaller ones that look just as cute when you embellish them!
 I love how pretty they are! 
 Vintage sewing notions....
 Pretty little girls who have sewn their own dresses.....
 French postcards and a stylish little partisan......
Another kitchen clipboard with a vintage feel.
These boards have been sealed and can be wiped clean with a damp cloth so they will last for years! 
Diana 

Thursday, September 19, 2013

Mascot For The Vintage Trailer!

Have you ever made something that just didn't want to go together smoothly?  So, that was this project.  First the gold frame was given new life with pretty aqua paint.  All went well until I started the embroidery.  So many problems.  I wanted it to work so bad I just kept handling each issue until finally it was done!  Yeah!  I took pictures and started my post....and then I noticed something.....hmmm.....are there two T's in knot?
Drat!  I can't believe I didn't catch that.  After all that trouble (embroidery download issues, breaking thread, puckering, running out of bobbin thread........) I still had a blaring error.  Maybe no one will notice.  Drat!  So I took it out of the frame (no easy task as I had stapled it together), spent some time and all my patience ripping out the extra T, cleaned every stray thread, put it back in the frame, stapled it close and took more pics.
 So here it is again.....with only one T.  And I love it.....again. 
Soon it will hang over the bed in the camper the A-Frayed-Knot. 
Which is a good thing cuz I think I need a nap.
Diana

Still Trying To Make My World Prettier....Clipboards!

Seriously, these clipboard make me giggle!  They are another project that starts with something utilitarian and glams it up.....
 Just pick a theme and go with it!
 A handwritten recipe, vintage pink stove and a few glamorous housewives, just right for holding important papers in the kitchen....or office!
 Vintage sewing notions or Hollywood icons.  You decide which best fits your style.
I love Lucy.......especially when she is in paper doll form.  And the chocolates will make any Lucy fan smile.  After seeing these can you settle for a plain brown clipboard?  You know you really shouldn't!
Diana

Tuesday, September 17, 2013

All Ready For Bed In My Vintage Trailer!

Now I have a place to lay my head if I need a little nap away from it all.  The couch makes a comfy bed at one end of the camper.
 I used a vintage quilt to cover the bed.  It still needs more pillows but those will come........
This will have to do for now, until after the next few weeks that will be so busy..  Then we will tackle more pillows and maybe even some bigger jobs.
Diana

Sunday, September 15, 2013

Yo Yo Lamp

I have been drooling over a lamp over at The Beehive Cottage that was just sooo cute. Maryjane does such cool crafts!  Love her blog!  But back to the lamp.....I knew I could make one but first I had to find a sweet tiny lamp that I could redo!  Easier said than done.  Finally I found the perfect hobnail milk glass beauty at a thrift store for $1.00!  I then picked up a shade at Walmart for $4.00.  Next came the task of making enough yo yos in different sizes and colors.  Two evenings later and I was ready to put it all together.   
 Using fabric glue, I place the yo yos all over the shade until it was covered to my liking.  That's it, easy as pie, maybe even easier! 
Doesn't it look pretty.  I think it will find a new home in my little vintage trailer!
Diana

Friday, September 6, 2013

Banquet Cushions For the Vintage Camper


Yippee!  I finished the banquet cushions!  Had no idea what I was doing......but they turned out just fine!
Just in case you forgot what they looked like before......
 Looking better all the time.


I still have 5 more cushions to do.  I have to cut new foam (ugh!) because the old stuff is just too gross.  It is a little tricky cuz the cuts are soooo long.  Lots of room to make a costly mistake!  But until the new zippers (72 inches, not something you find at Walmart) arrive I am taking a break!  Well except for the awning I am making......
Diana


Wednesday, September 4, 2013

Shabby China Plates Redo

Do you have a few pieces of old china that are just taking up room in your cabinets?  Not enough pieces to set a table but too pretty to toss away?
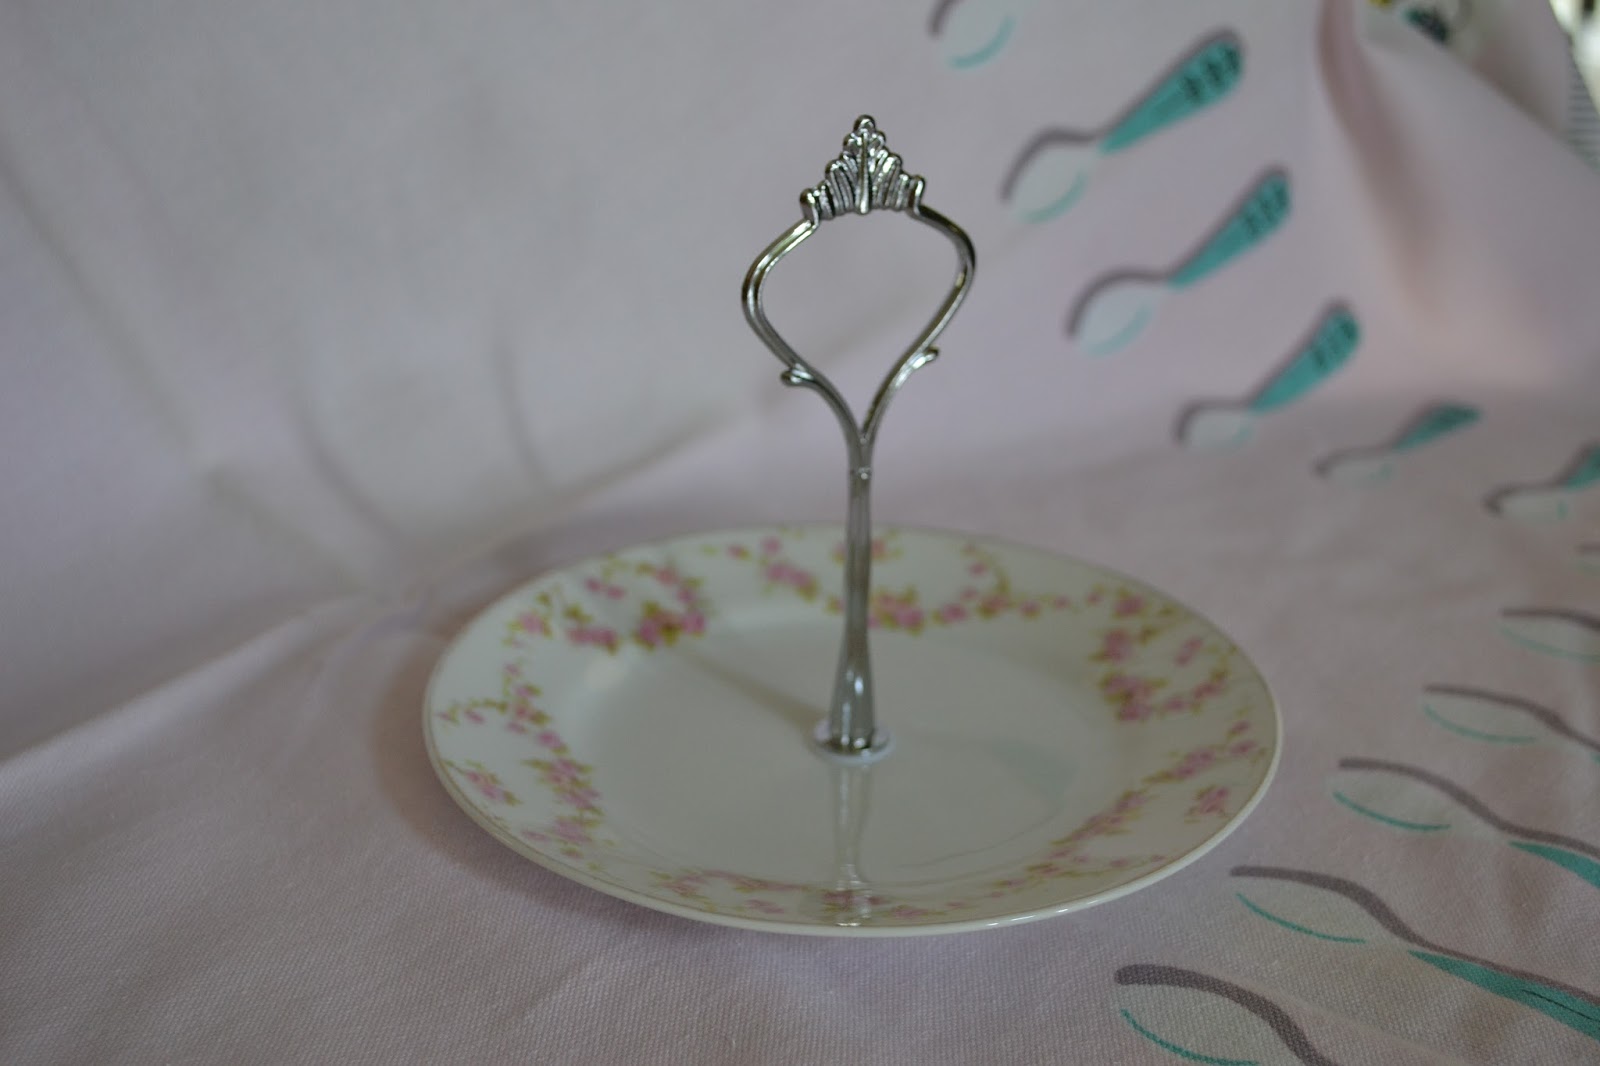
 With a drill and a bit of patience you can turn them into pretty dessert and sandwich stands, or maybe even jewelry holders!  Here are a few I have made in the last week.......  Above is one using a small dessert plate.
 Another dessert plate and dinner plate.
Small bowl and dinner plate.  If you want to make one you will need a 1/4 drill bit for glass and tile, Cake Stand Handle 2 Tier Silver Crown Center Rods Fitting (available on ebay) and some old dishes.
Mark the center of dish on back with sharpie pin.  Use a block of wood to support plate and start to drill.  Be careful at first as the bit may jump around on the plate until it nicks the surface.  I found that starting with a much smaller bit was easier.  Then I switched to the 1/4 bit after the hole was already started.

Switch to drilling from the front once the drill bit has just barely gone through the surface of the front.  That will limit the possibility of chipping the front of the plate surface.  Continue drilling until you have a neat 1/4 inch hole completely through the plate.
Assemble the stands using the rubber gaskets in the kit.  Clean everything off and you now have the prettiest little dessert stands ever!
Diana