Friday, July 29, 2011

Dandylion ReDo

I didn't have anything to do today, and since I didn't feel like leaving the house I had to improvise with what I had in the attic. I found this old sign and decided to turn it into a new wall hanging for my dining room.
First I found some old paint in the basement. Thank goodness for a husband that doesn't throw old paint out! I rolled it right over the sign. It took several coats to hide these bright colors.
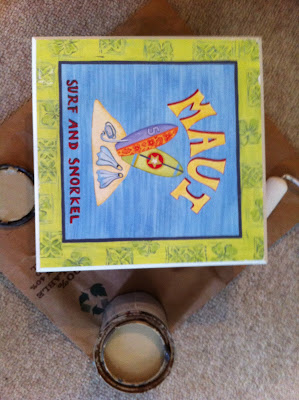
Then I found two images I liked on the Internet and used graphite paper ( in the drawing section of Hobby Lobby) to arrange them how I wanted them on my new artwork.
Next, I used a Sharpie to color in the image. I added a little distressing by smudging it up and bit, and Voila!
Thursday, July 28, 2011

Make Your Own Apothecary Jar

I have been looking at apothecary jars at the store for a while now. They seem to come in two types. Lovely, heavy weight glass that is very expensive or less expensive ones made of very light weight glass. While I loved the prices of the cheaper ones, the glass feels so fragile I am afraid they would break too easily. So why not make my own out of heavy pieces that don't cost much! And I can also do a little glass etching to make it very personal and custom. Here is how it turned out! I like it so much I think I will be making more in different sizes!

I got the candle stick and kitchen container at Walmart. Both are made from very heavy glass and the shapes were compatible.

I glued the two together with e-6000 and let sit for about 4 hours.

Next I cut out my initial from vinyl.

Etching cream. 15 minutes. Wash off. Instant gratification.

I swear this looks so expensive! Now the only problem is what to fill it with! Diana

Sunday, July 24, 2011

Baa Baa Sheep Cookies

Last Sunday our long time bishop was released. One of his themes over the years was that of the faithful shepherd. The fact that he also has raised hundreds of sheep added to his image. So, to thank him for his service, I baked him up some sheep cookies! If you notice, some of the sheep has happy faces, some mischievous ones and some a little grumpy. Hmmm, I wonder which ones represent which members of our congregation...... To get this shape I used a six petaled flower for the body and a small square for the feet. Diana

Saturday, July 23, 2011

Candy Bar Wrapper

Another Article of Faith reward for a hard working primary child! A girl this time so it had to have some pink on it. Diana

Thursday, July 14, 2011

Candy Bar for Monkeys

Sometimes you just need to be silly! This candy bar cover is a reward for a job well done. A boy at church has learned all thirteen Articles of Faith, which is reason enough for a giant size treat. The monkeys are brads with wiggle eyes. This will be a delicious way to celebrate a great accomplishment. Diana

Tuesday, July 12, 2011

Class Photos Bracelet

What to do with all those class photos your kids exchange........make a charm bracelet using Shrinkadink! This was an easy, fast and FUN project that costs very little too! For privacy issues (my daughters explained to me that you don't put pictures of other people's children on your blog without permission) I used V-E-R-Y old class photos from the 40's.

I liked the effect that these black and white photo give. Of course you could print them in color for a completely different look. My photos were each printed at about 1 3/4 x 2 1/2 inches on the dull side of a sheet of Shrinkadink. Using a 1 3/4 circle punch, I centered each face and punch it out.

Then I punched a small hole (office size or 1/4 inch) near the top.

Now comes the magic! Holding the disk with a pair of craft tweezers, I blasted it with a heat gun! This is sooooo much faster than putting it in the oven. The disk will quickly shrivel up and then flatten out again. I had a metal spatula handy to press on the disk while it was still warm to get it really flat.

As you can see the shrunk charms are much smaller than the originals!

Once I had all the pictures shrunk, I attached them to a charm bracelet I picked up at the craft store. I used the gun metal finish to match the old time feel of the charms. Now your child can wear photos of their friends and add to them over the years. Or you could make a completely new bracelet each school year! And what about making one for their teacher as a special thank you at school's end! So many options and so little time...... Diana

Sunday, July 10, 2011

Old Glory Pie

I know this is a little late for the 4th but we were on vacation and I couldn't post! This pie was so easy, in fact, my granddaughters helped put it together. We used store bought everything because we were on vacation and making it from scratch just seemed like too much work! Blueberry pie filling became the blue background for the star and cherry filling for the rest. Then we used refrigerated pie crust to make the stripes and the one star! A little milk wash and sugar and some time in the oven and we had a beautiful pie for the 4th that the children loved! Diana