Tuesday, August 31, 2010

Grubby Crow

These are all over the stores this year and I wanted to see how hard they would be to make. For the cost of some bits and pieces and about one hour's worth of crafting, I think it came out just as I had hoped. Scrawny and grubby..... just as I pictured it. You start out with a quickly drawn pattern that you then cut out of muslin. Sew together, turn and stuff and stick a dowel into his tummy. Then start painting everything with black craft paint, including a box that I attached a tiny wooden flower pot on top off. (Drilled a hole in the bottom of the pot to accept the dowel.) Put everything together with craft glue, sand it all, and apply a little brown shoe polish and a bow. Done. Easy.
Oh, and sew on a couple of miss matched button for eyes. C'rows have to have button eyes, It's a rule. Really.
The little bee hive is made from bees wax that we harvest from our own hives. Too cool. Diana

Sweet Soap

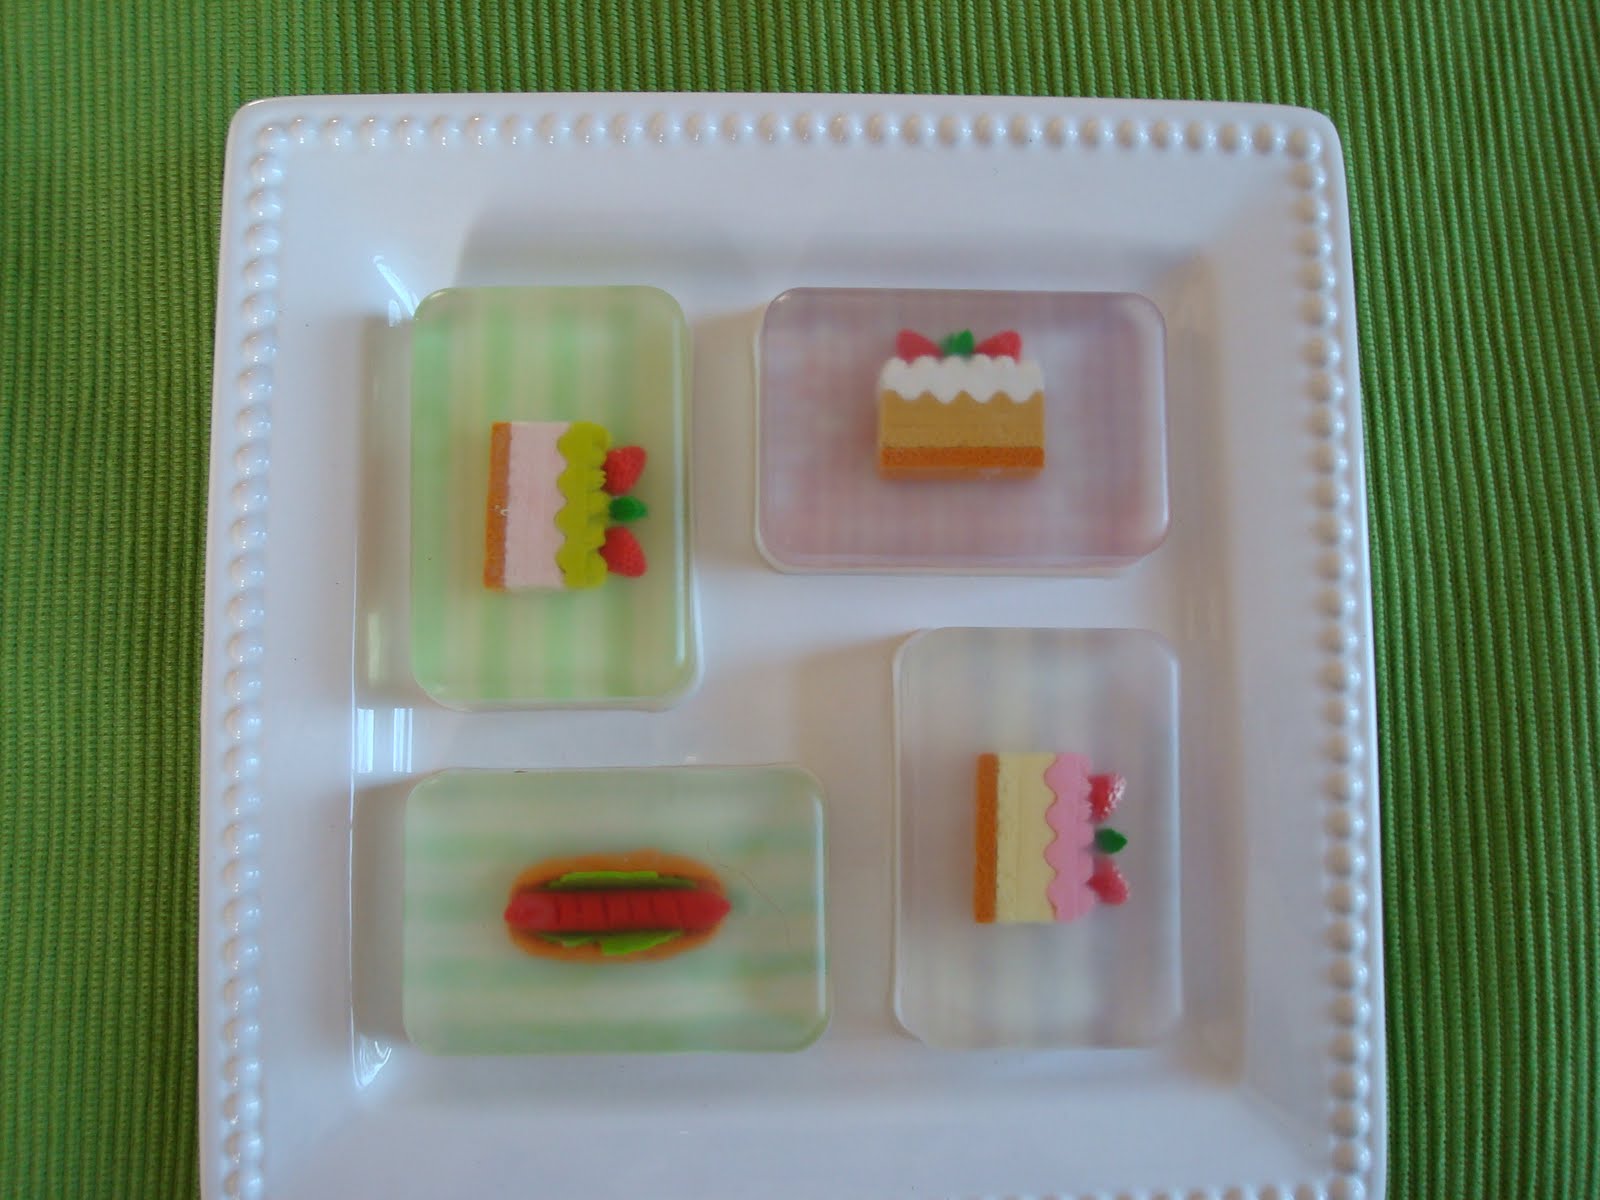
Don't these look good enough to eat? And I do believe this is the ideal meal.....one hot dog and three pieces of cake! I embedded Iwako erasers between layers of clear melt and pour soap. These erasers are so realistic. Here's how I did it. I poured a 1/4 inch layer of clear soap in the bottom of the molds. After two minutes, I placed the erasers, face down, in the soap. After a few minutes more I sprayed a bit of rubbing alcohol on the soap and poured more clear soap over the erasers, covering them. When the soap had developed a film, I laid a sheet of water soluble printed paper on the soap. Let set till pretty firm. Spray with alcohol and then pour white soap over paper and fill mold. The soap is scented with raspberry. I know, weird with the hot dog but it goes great with the cake!
The paper was printed on the computer and is very muted. These will be great to give as gifts! Diana

Friday, August 27, 2010

All Dressed Up and No Place To Go

What's a girl to do? This kitty can't wait for Halloween to get here!! I made her from modeling clay over Styrofoam and while it took a bit of time, I am really happy with her. I started off with a cone that I cut about an inch off the top.
Next I used a Styrofoam ball that I covered in clay and gave it some ears.
The cone was also covered and I inserted two tooth picks to attach the head to.
I added two arms...
and poked two holes the same diameter as the dowels I would be using for legs.
I cut two dowels about five inches long and inserted them into the holes I drilled in a disk that would serve as a base. Then I baked her on low heat for about 15 minutes and repaired any cracks that developed.
I painted the kitty black and her dress white. I stamped little spiders on the dress and stripes on her legs. More details were added like the band of white with orange dots on the base and the funny face. A paper collar around her neck adds a bit more color to the predominately black and white color theme.
The face was easy because it is folk art so perfection is not allowed! Once she was painted, I sprayed her with a bit of sealer just to protect the finish.
The last bit of whimsy is her bag! I cut it with the Cricut and Tags, Bags...... Then I used an image from the Graphics Fairy for the funny little scaredy cat. She is so funny that I hate to put her away until October! Diana

Thursday, August 26, 2010

Results Are In On Laundry Detergent!

Well I have done quite a few loads of laundry with the homemade detergent shown in a previous blog. Love it! Every thing, from delicates to jeans caked with mud (funny story....but I'm OK!) came out beautifully! One trick I learned from a lady at church.....after pouring the powder into the detergent slot, pour a cup of water in same slot to make sure it all gets down into the machine. It also keeps the area nice and clean from caked up powder! Diana

Tuesday, August 24, 2010

Links for Laundry Graphics

Here is the link to the Laundry graphic I used on my soap jar yesterday! http://graphicsfairy.blogspot.com/2010/03/thursday-is-request-day-regency-lady.html Hope this works OK!

Monday, August 23, 2010

Homemade Laundry Soap

I have been seeing homemade laundry soap recipes all over the blogs so I have been wanting to try my hand at it too! I thought the dry detergent made more sense for me so while in Amish country I picked up the supplies. Then I purchased a large glass container at Walmart. I printed up this image from The Graphics Fairy and ran it through my sticker maker.
Here it is applied to the front of the jar.
I printed the recipe and directions for use on the back of the label so I won't lose them!
Here is the detergent. It looks so pretty with the specks of pink and yellow soap. I used one bar of laundry soap, 1/2 bar of Zota, 1 cup Borax and 1 cup Washing Soda. I did grate the soap with my Kitchenaide but the soap was soft so the pieces were kind of long. I then used my machines whisk on the mixture until it had a more uniform size. Maybe next time I will freeze the soap first to make it break off in smaller pieces.
It didn't make much but you only use 1 to 2 tablespoons per load!
I love the look and will use some today to check out how well this works! Diana

Friday, August 20, 2010

Burlap and Pumpkins

With Fall just around the corner, I have been itching to pull out the decorations for my favorite time of year! But the temperatures are still in the 90's so I am holding off for a little while. It doesn't stop me from crafting though!!! Today I made this cute picture with some of my favorite images from the Graphics Fairy. I took a canvas from Walmart and stapled burlap to it. Then I decoupaged these images to the front and let dry. Simple and fun! Diana

Tuesday, August 17, 2010

Butterfly Pillow

I made this pillow today at Grandma's house. I used the embroidery machine and picked purple for my butterfly. I choose the fabric because I thought it would look good with the butterfly. It was really easy because I just had to watch a machine.

Abby

Monday, August 16, 2010

Shadow Box Hearts Tutorial


I love all of the projects that use old books in them. I found an old book with nice coloring to the pages and decided to do a shadow box.


The first thing I did was cut out 41 hearts from my used book. I did it with my Cricut, but I am sure that a heart hole punch would work just as well. I also found a nice rusty read piece of card stock that I cut one heart out of.


I creased the hearts down the center and curled them with my fingers. I then attached them to a piece of white card stock using permanent glue. They are spaced 1 1/2 inches side to side and top to bottom. It worked out just right-which is lucky because I glued them several on before I thought about how it would center.


Then I found a simple shadow box at Hobby Lobby and inserted it in. Quick, easy, and inexpensive!


~Jennifer

Friday, August 13, 2010

Notebook Vinyl

Look how cute this is! I had seen a few examples of vinyl on laptops but none really struck me so I started experimenting. I had this cut available on From My Kitchen Cricut cartridge and thought it would be great.
But all I had was white and black vinyl and that was soooo boring. So I took marking pens and colored the cherry.......of course it wiped right off! But it left behind a permanent stain that looked like watercolor. Cool. I then used the backing from the cupcake vinyl to mask the areas I didn't want color on and Ta Da! I so love this! Now my notebook is uniquely mine! Diana

Thursday, August 12, 2010

Halloween Coffins

I got the new Happy Haunting Cricut Cartridge and here is my first project! These are cute little coffins for treats or whatever! I cut out both version (one has a scalloped edge which is difficult to see in these pics) and decoupaged them to give them a shine and a bit more weight. It also caused the card stock to get a little wavy but I kind of like the effect. It adds an aged look to them.
The bat ladies are from The Graphics Fairy. I tore roughly around the images and decoupaged them on the boxes.
I also printed up some word strips and decoupaged them on too!
Here is a side view. The boxes are in two pieces, a bottom and a lid. I can't wait for Halloween so I can use these! Diana

Tuesday, August 10, 2010

Wild Blackberry Cupcakes

Here in Ohio we have a wealth of berries that just grow wild in the woods and meadows. We picked a quart of them and cooked them down into a syrup. I used some of it to make these Wild Blackberry cupcakes today! I added some syrup to the homemade vanilla batter. They baked up a pretty shade of dark violet and after they cooled I piped in a cream cheese filling in the centers.
The frosting is a simple buttercream that I also added the blackberry syrup to! The tart berry flavor cuts through the sweetness of the sugar making these seem particularly light. Well.....OK. I guess that might be an overstatement cuz there is a lot of frosting on these and there isn't anything healthy about them. But who cares, I can't wait to dig into them! Diana

Sunday, August 8, 2010

Bee Happy!

Where do you go when you need a picture of a bee that is realistic and got a little vintage vibe going? The Graphics Fairy of course. Here is a neat little bee that I glued inside a bottle cap pendant and then covered with liquid epoxy. The bee is very tiny and fits inside the center of the cap which measures 16 mm. The epoxy goes in very smoothly and dries in about 24 hours. Diana